How to Build a Squarespace Website Fast (That Looks Professional & Actually Converts)
An ADHD designer’s 3-phase method to build a Squarespace website that looks custom, loads fast, and sells your magic.
You’ve opened Squarespace, scrolled through every template, uploaded a few photos, and somehow your homepage still looks like a moodboard in crisis.
Don’t panic — you’re not alone.
Building a Squarespace website doesn’t have to take forever (or drive you into font-switching madness).
With the right structure — and a few designer shortcuts — you can go from “no clue” to “oh wow, this actually looks professional” in days, not weeks.
I’m Marta Lebre — a Squarespace designer, brand strategist, and proudly ADHD business owner. I’ve built dozens of Squarespace websites for clients, plus a few that now sell as templates.
I love fast.
I love focused.
I love making things look like they took months when they really took three afternoons and a strong coffee.
Here’s my tried-and-tested, three-phase system for building a professional Squarespace website that not only looks beautiful — it converts.
Table of Contents
Some of the links in this post are affiliate links — which means I may earn a small commission if you choose to buy through them (at no extra cost to you). I only recommend tools and templates I genuinely use, love, and know will make your Squarespace life easier. Promise.
Phase 1: Pre-Design Tips for Building Your Suarespace Website Fast (& Without Losing Your Mind)
Before you dive into fonts and layouts, there’s a smarter way to build your Squarespace website — one that saves you hours of tweaking later.
These pre-design Squarespace website tips help you get clear on your content, visuals, and structure before you open the editor. Whether you’re using a template or starting from scratch, a little prep work makes everything faster, smoother, and a lot less overwhelming.
It’s your creative warm-up: gather what you need, plan your pages, and watch your Squarespace site come together effortlessly.
STEP #1: Know Your Website’s Job
Before you start designing, take a moment to plan with intention. These pre-design tips for building your Squarespace site will save you hours later and help you launch faster with confidence. Start by defining your Squarespace website goals — what’s the main website purpose?
Your Squarespace website has one job — to help your dream clients take action.
Ask yourself:
What do I want visitors to do here? (Book, buy, inquire?)
Who am I talking to?
What transformation am I promising?
Then write one clear sentence that sums it up:
“This website helps [who] [do what] so they can [benefit].”
That sentence becomes your design compass. Every photo, headline, and button will orbit around it.
When your Squarespace design strategy aligns with your goals and audience, your content flows naturally, your visuals feel on-brand, and you can build your Squarespace site fast — without endless tweaking or second-guessing.
STEP #2: Decide on Your Pages
Decide what pages you absolutely need to launch — you can always add more later. You don’t need a fancy sitemap or flowchart; you just need clarity.
Start simple:
Home
About
Services / Offerings
Contact
That’s your foundation. Add a Blog or Shop later once your core pages work.
Keeping your Squarespace website structure simple helps you build your Squarespace site fast, get it live sooner, and refine as you grow.
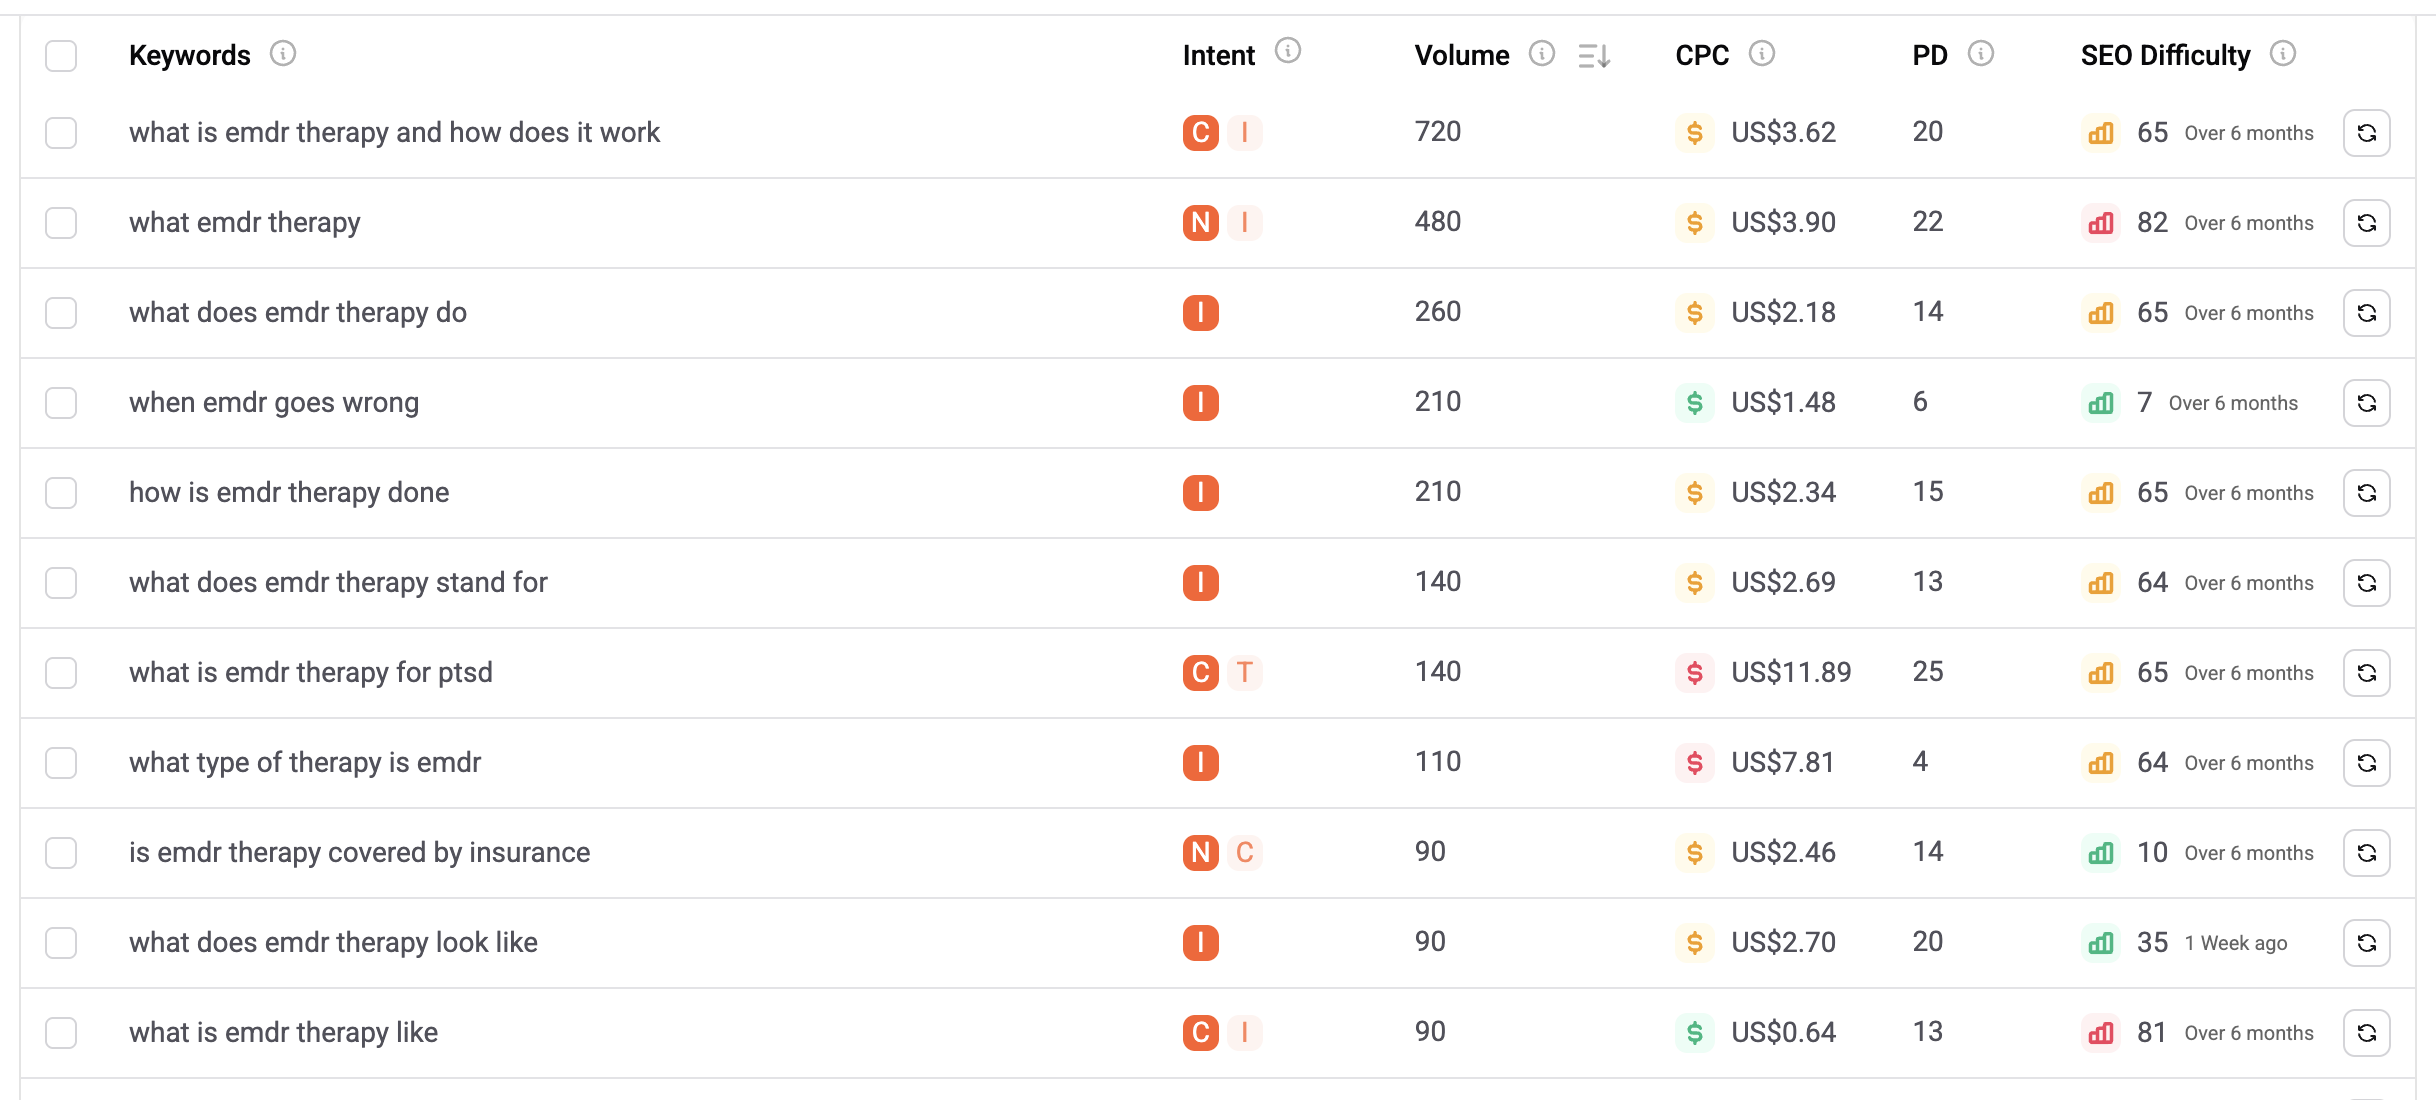
STEP #3: Do Proper Keyword Research (You’ll Thank Me Later)
Before you create a website on Squarespace, take ten minutes to find out what people are actually typing into Google. Keyword research is what turns a beautiful Squarespace website into one that’s discoverable. It helps you speak your clients’ language, name your pages strategically, and attract people who are already looking for what you offer.
If SEO feels like a dark art, start with one of my niche guides — they’ll show you exactly how to find the best keywords for your field:
Choose the one that fits your business, grab a few high-intent phrases, and sprinkle them into your site naturally. It’s one of those small steps that quietly changes everything.
STEP #3: Prepare Your Content (the Fast Way)
If you’ve ever stared at a blank About page for hours, welcome to the club.
Copywriting slows everyone down — which is exactly why I built a shortcut.
✨ All my Squarespace templates include AI copy prompts that help you write your website in your own voice — fast. Just make sure to include your keywords.
Gather this before you start designing:
One-line headline for your homepage
2–3 call-to-action phrases you’ll reuse (“Book Now,” “Explore Templates”)
A short About blurb
Simple descriptions for each service or offer
The goal isn’t perfect prose. It’s to have something ready to design with.
STEP #4: Gather & Optimize Your Photos
Good photos make your Squarespace website look professional. Optimized photos make it load fast (which also helps SEO).
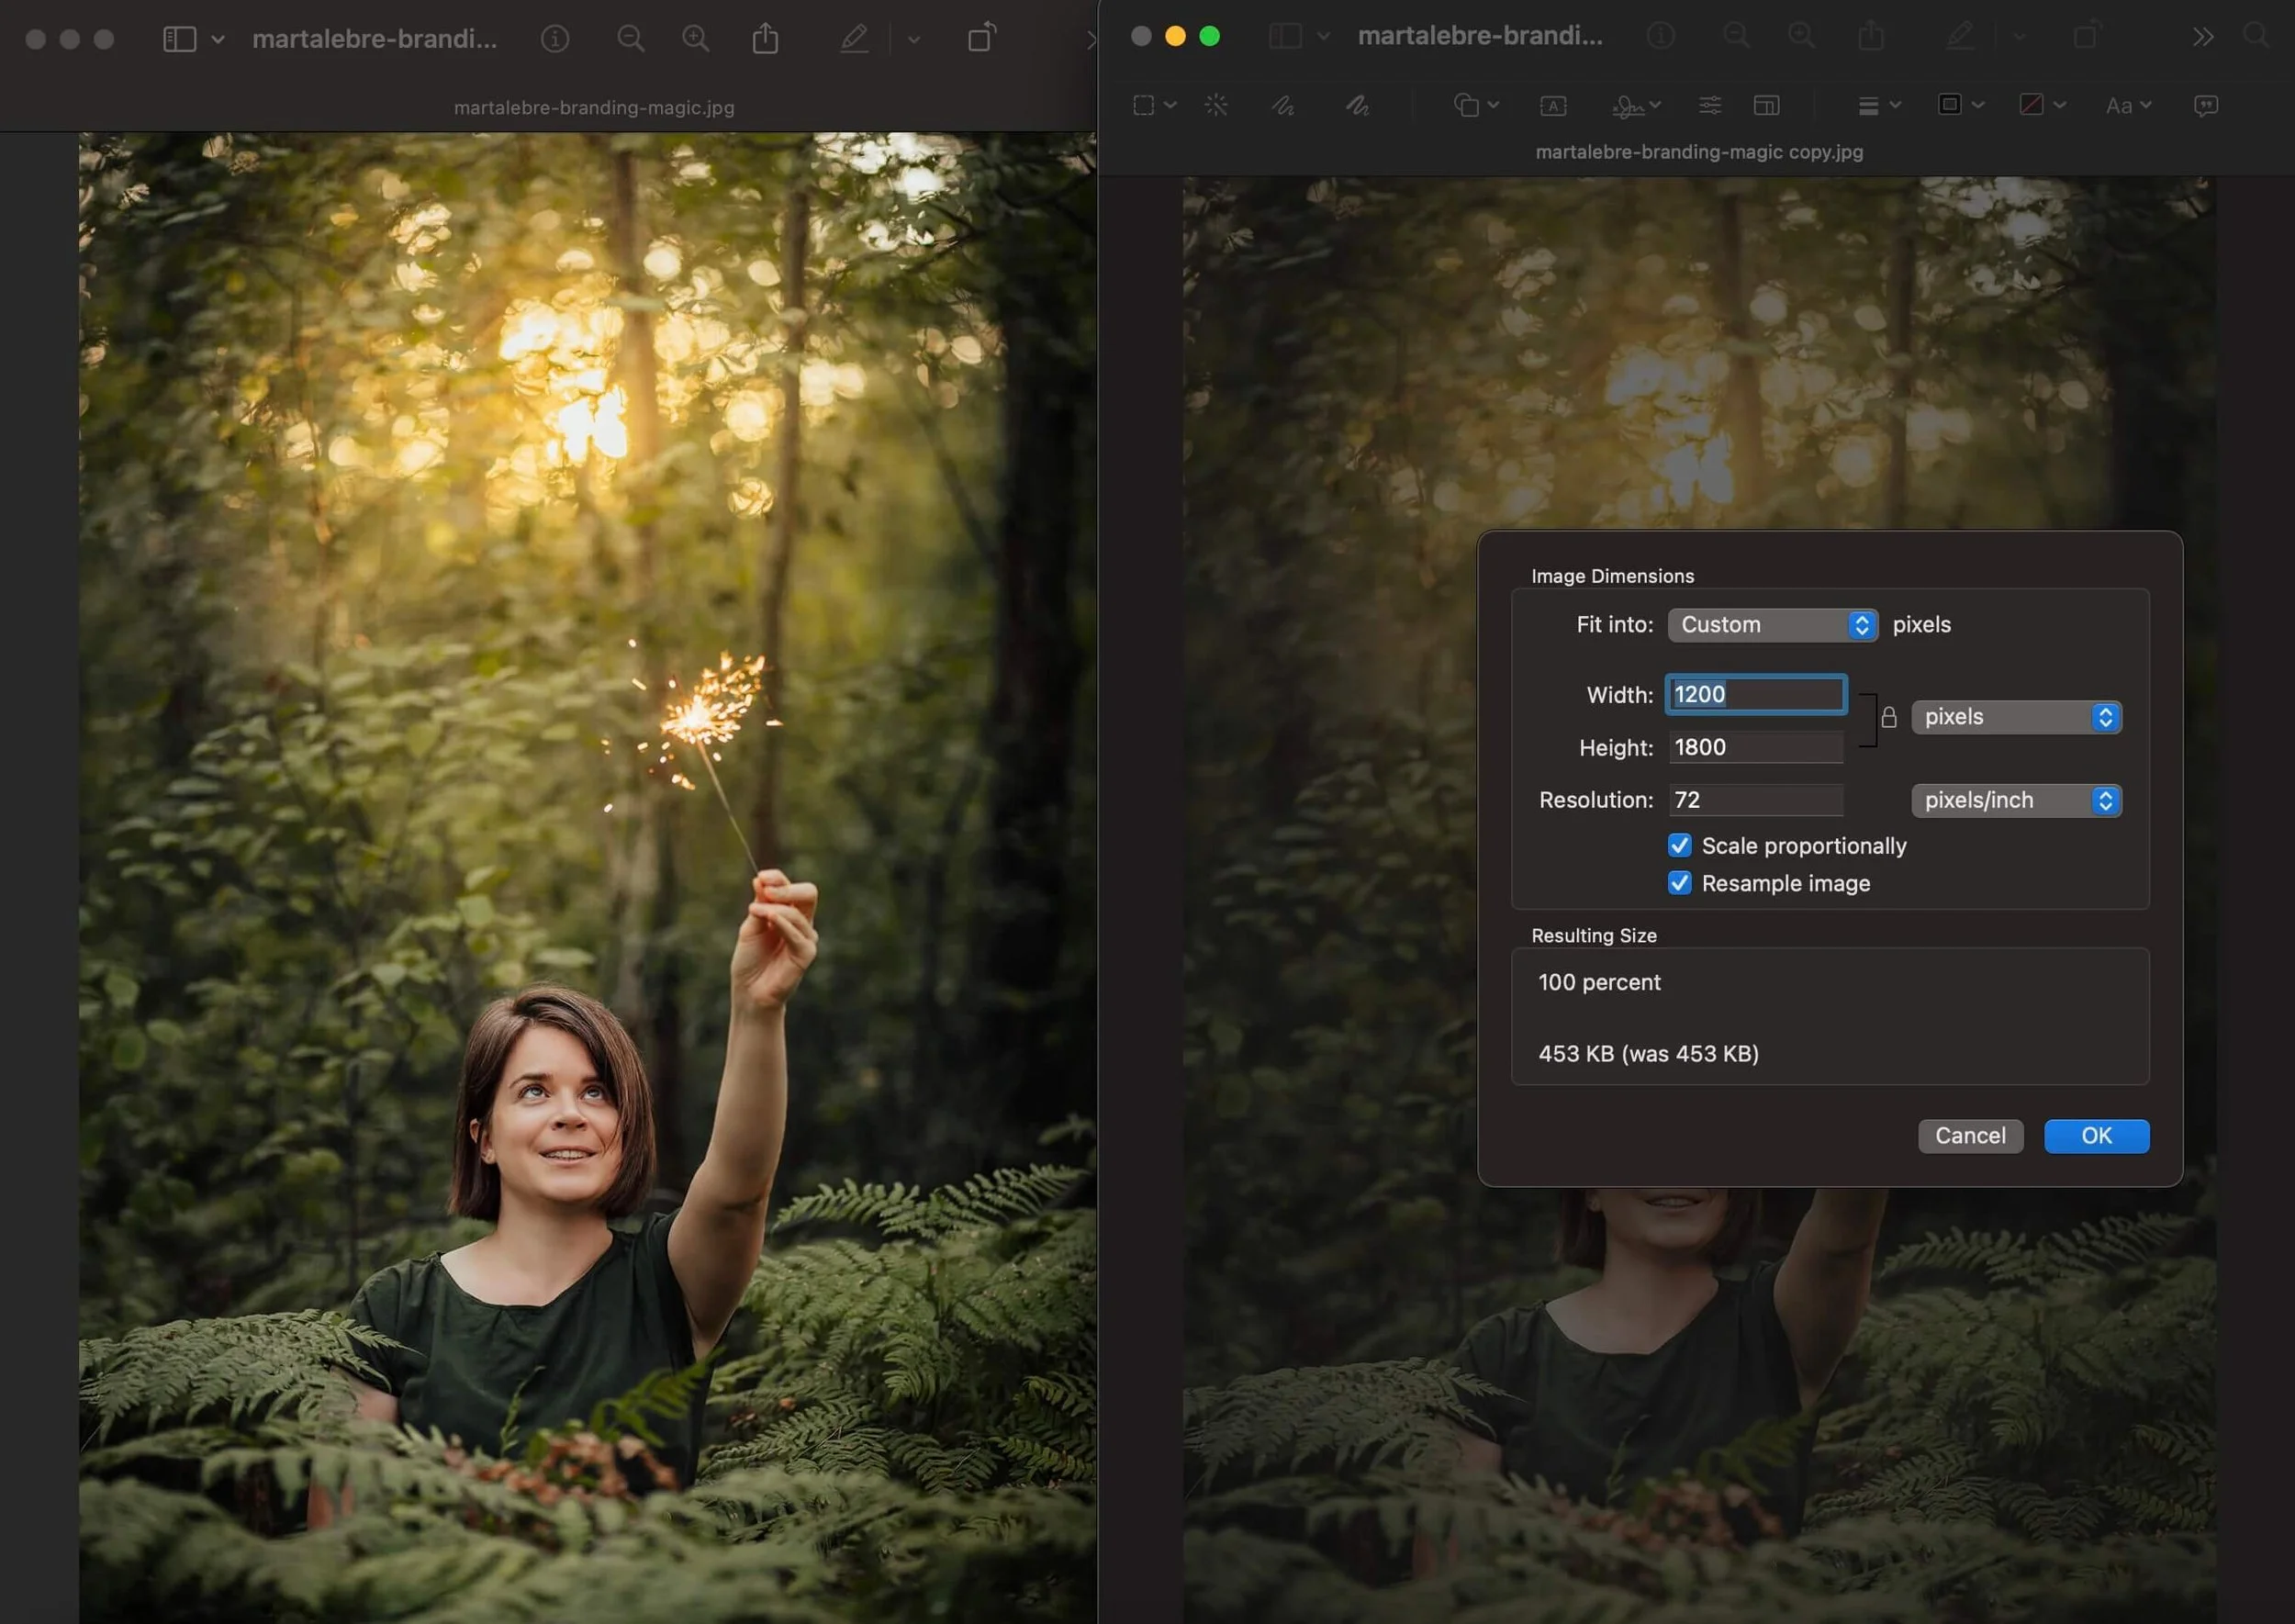
Here’s how to prep them:
Resize before uploading (if you’re a Mac user, you can easily reduce the size in Preview — see the image below)
Hero images: up to 2500px wide
Regular images: 1200–1600px wide
Compress with TinyPNG or Squoosh — aim for under 250KB per image
Use modern formats like
.jpgRename files descriptively (e.g.,
therapist-office-brand-photo.jpg)
Choose 6–8 intentional images and reuse them across pages. Consistency feels polished. Redundancy feels chaotic.
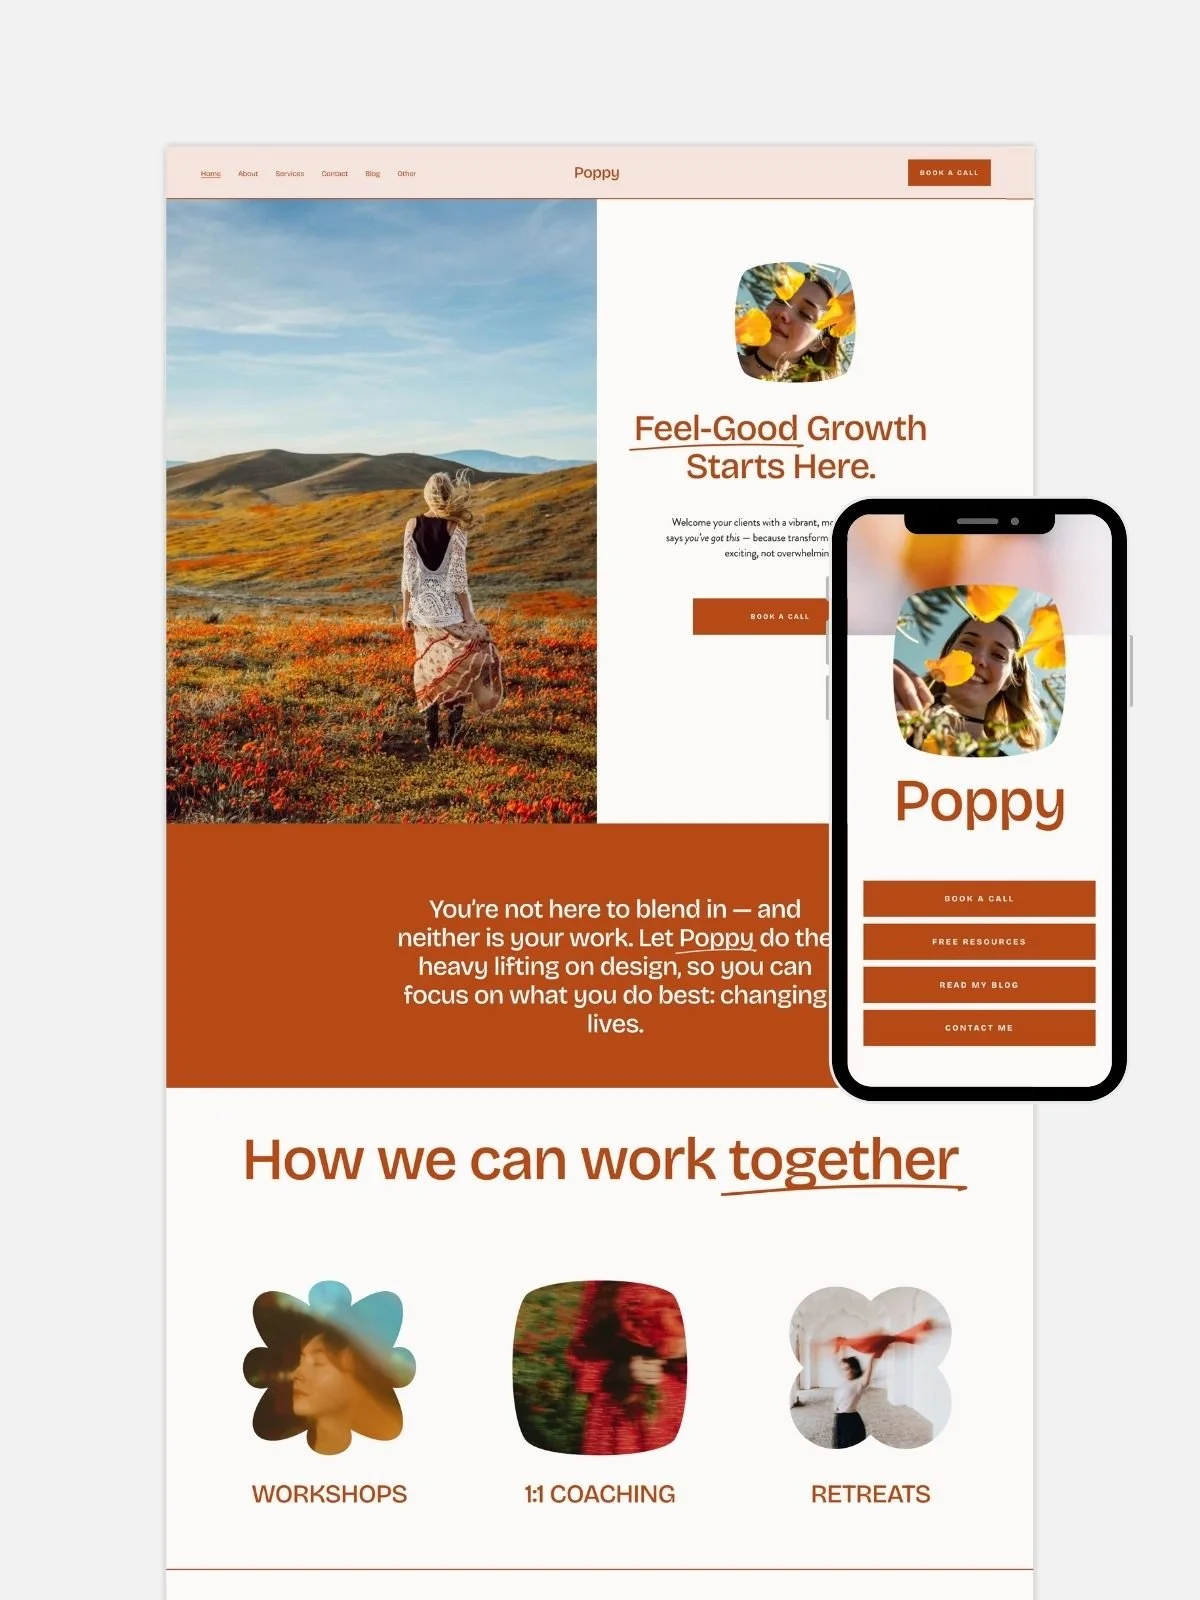
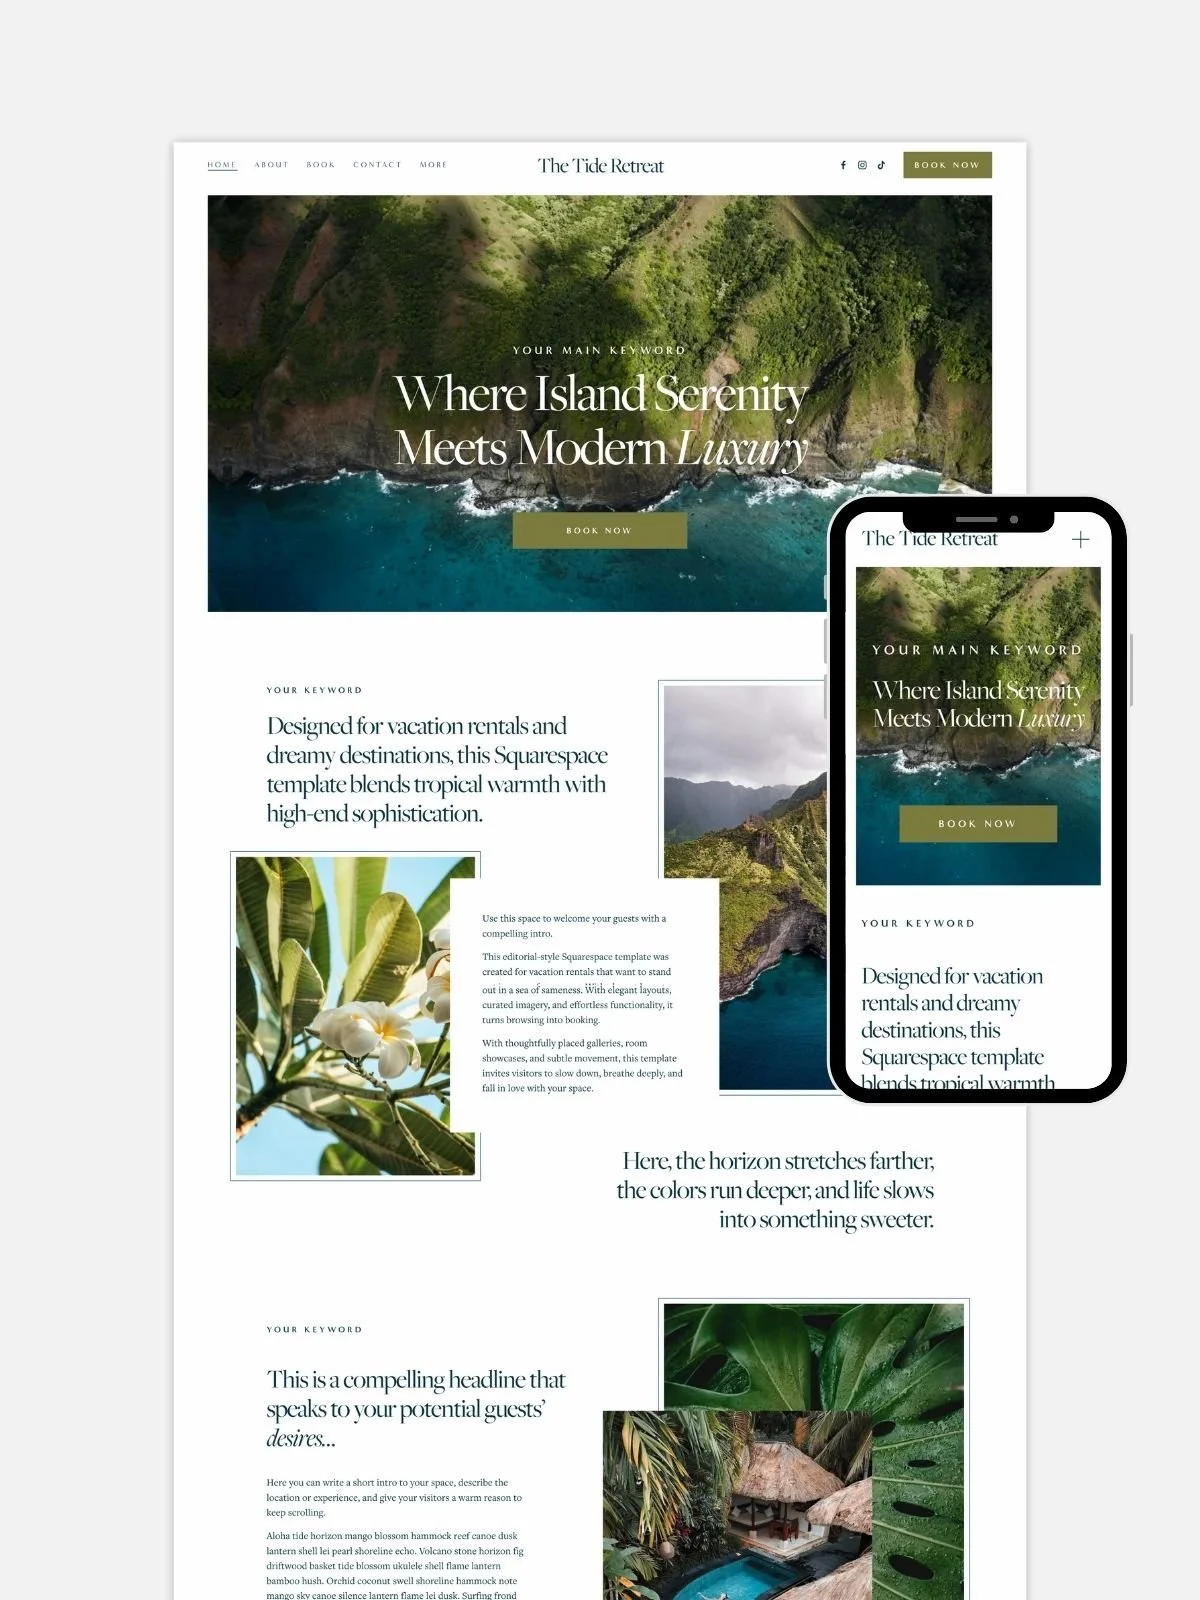
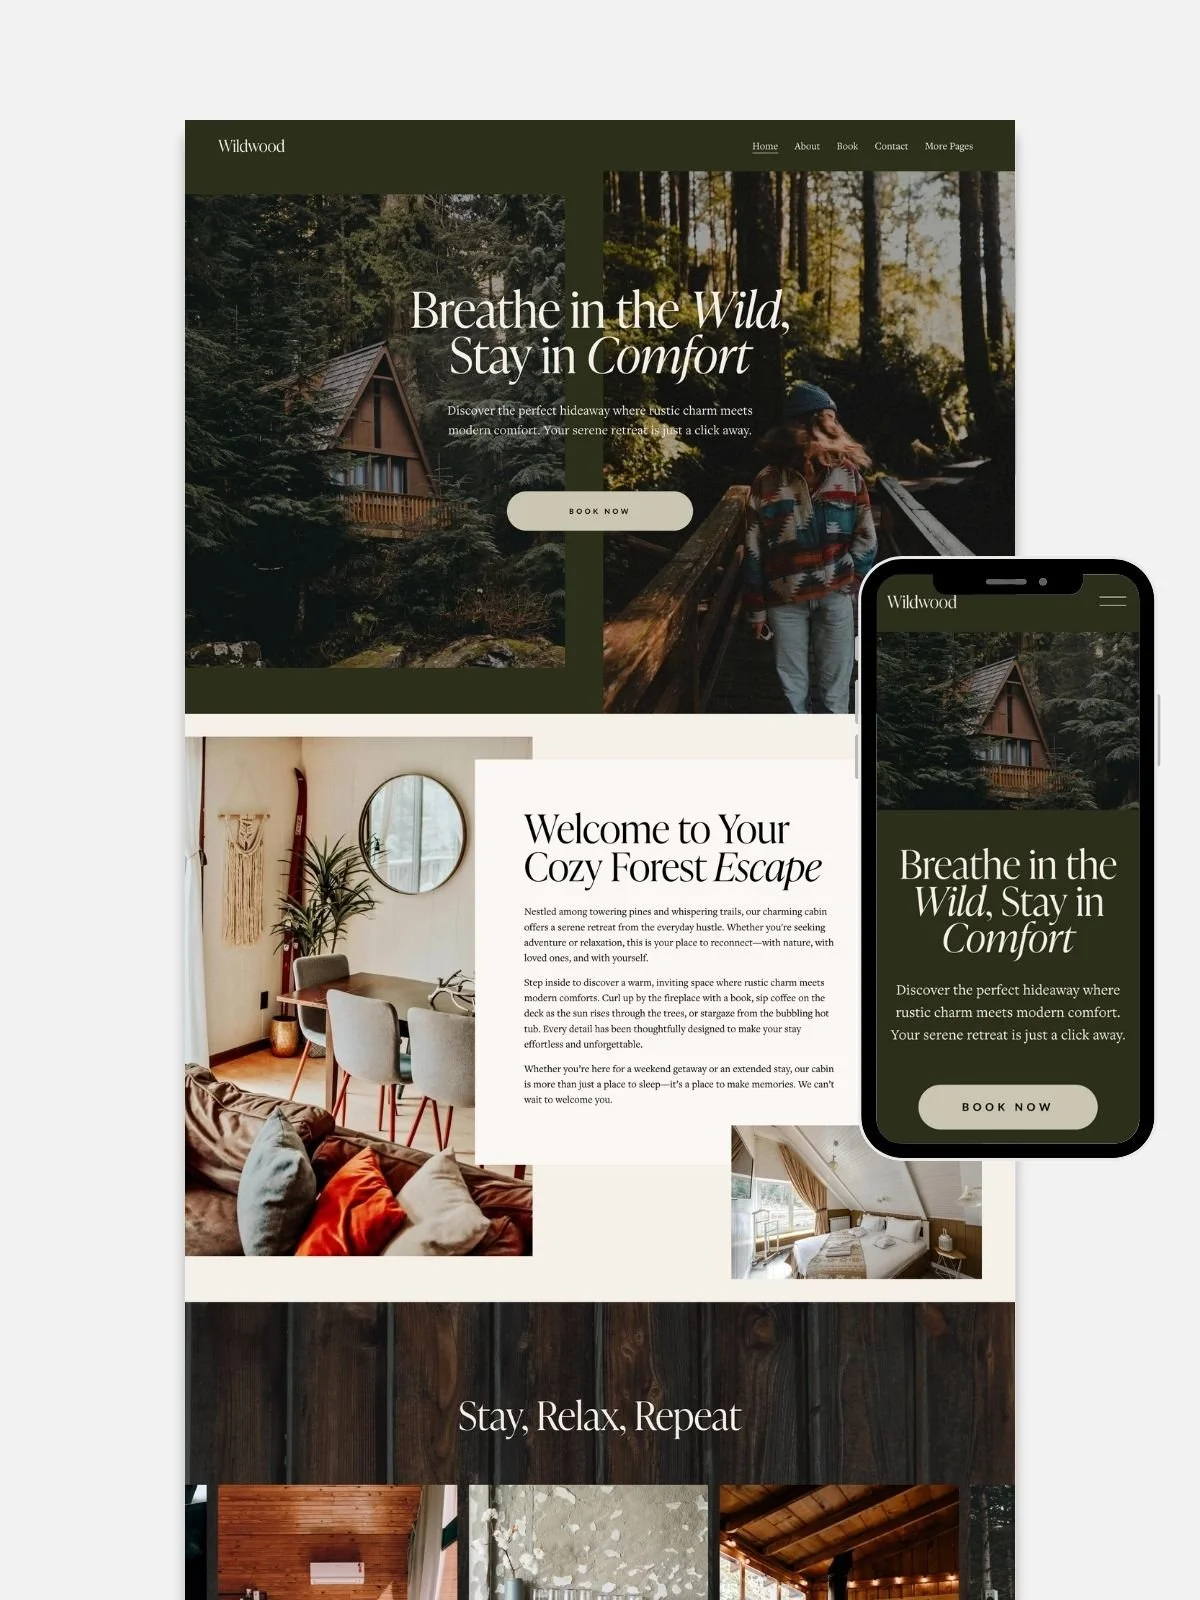
STEP #5: Choose Your Template (and Commit)
The easiest and fastest way to build a Squarespace Website in by starting with a template. When you’re choosing a Squarespace template, don’t obsess over colors, fonts, or demo photos — those are the easiest things to change. Instead, look at layout flow and structure.
Does the homepage guide you naturally downward, section by section?
Do the navigation and header feel intuitive?
Are there built-in blocks for what you actually need — services, testimonials, galleries, or bookings?
Squarespace’s built-in templates are flexible and free, which is great — but they all share the same core structure. You’ll just need to do more rearranging to make them look custom. Perfect if you enjoy tinkering and don’t mind styling everything yourself, but “free” usually comes with a bit of trial and error.
My premium Squarespace templates skip that learning curve. They’re designer-built, strategically structured, and ready to convert right out of the box. You can still customize everything — colors, copy, and images — but the hard part (layout, SEO, and flow) is already done. It’s like starting halfway to “wow.”


STEP #6: Define Your Visual Style
When I design a brand or build a Squarespace website, I always start by feeling into the energy behind it — not the color palette or font pairings yet, but the essence. Is it soft and grounded? Playful and bright? Luxurious and restrained? Once I sense that mood, I translate it visually through textures, colors, and typography that express that feeling without words.
It’s less about what looks trendy, and more about what feels true.
From there, I curate a few anchor visuals — a set of colors, fonts, and imagery that hold the same emotional frequency. These become the brand’s visual compass. When you know your style, every choice (from website buttons to Instagram posts) starts to flow naturally. It’s not about chasing perfection — it’s about coherence, alignment, and that quiet click when your brand finally feels like you.
So before you dive into building:
Pick one headline font and one body font
Choose 1–2 brand colors and 1 neutral
Decide on a button style (filled or outline)
Then promise yourself you won’t change them mid-design.
Clarity creates speed.
Phase 2: Design
Build the actual website inside Squarespace — fast & intentionally
Now we open Squarespace. This is where most people get lost in options. Our job is to follow a clear sequence instead of randomly clicking.
STEP #7: Start With Global Styles
Before you start dragging blocks around, set your global styles — your fonts, colors, and buttons. In Squarespace, this is the control room for your entire website’s visual identity. Getting it right from the start keeps your brand consistent and saves you hours of editing later. Every new section you add will automatically match your look, so instead of re-styling every headline or button, you can focus on what actually matters — flow, copy, and storytelling.
A few intentional clicks here, and the rest of your design will feel effortlessly cohesive (and yes, a little bit designer-level).
In Squarespace:
Go to Design → Site Styles (or similar, depending on version)
Set:
Heading font
Body font
Button style
Base font sizes
Colors
Spend a bit of focused time here to:
Make sure text is readable (not too tiny, not neon yellow on white 🙃)
Check headings and body work well together
Make buttons stand out clearly
Once global styles are set, every new section you add will already look consistent. You won’t have to fix the same thing on 15 different pages.
STEP #8: Build Your Home Page Conversion Path
Your homepage is where people decide — often within seconds — if they trust you, if they understand what you offer, and if they want to keep reading. Every word, image, and button should help them take one simple next step. A good Squarespace homepage layout is about clarity and flow. When it’s built with intention, your homepage quietly guides visitors toward the action that matters most — booking, buying, or getting in touch — without ever feeling pushy.
Your Home page should:
Explain who you are and what you do
Make visitors feel “oh, this is for me”
Show them where to click next
A simple, high-converting structure:
Hero section
Clear headline: “Squarespace & SEO for vacation rental owners.”
1–2 short sentences of context
One strong button (primary action)
Social proof
Testimonials, logos, “As seen in,” client wins
Services snapshot
Short overview of what you offer – each with a link
You / About preview
Short “this is who I am and why I care” bit
Final CTA
“Browse templates,” “Book a free consult,” “Get in touch”
📈 Keep in mind:
If a stranger landed on your Home page, would they know in 5 seconds:
What you do
Who you help
Where to click next
If yes, you’re winning.
STEP#9: Work Section-First, Not Page-By-Page
This is where most DIY websites slow to a crawl — trying to perfect one page before moving on. Don’t do that to yourself. Designing in Squarespace gets so much faster (and cleaner) when you build section by section instead of obsessing over whole pages. Create one layout you love, duplicate it, and keep going. It’s how designers work: reuse, refine, repeat. You’ll end up with a site that looks consistent, feels intentional, and takes a fraction of the time to finish.
Here’s how I do it inside Squarespace…
Design one really solid section (for example, a service teaser or testimonial block)
Then duplicate that section and tweak the content for other pages
Use the same section style on multiple pages for a consistent look
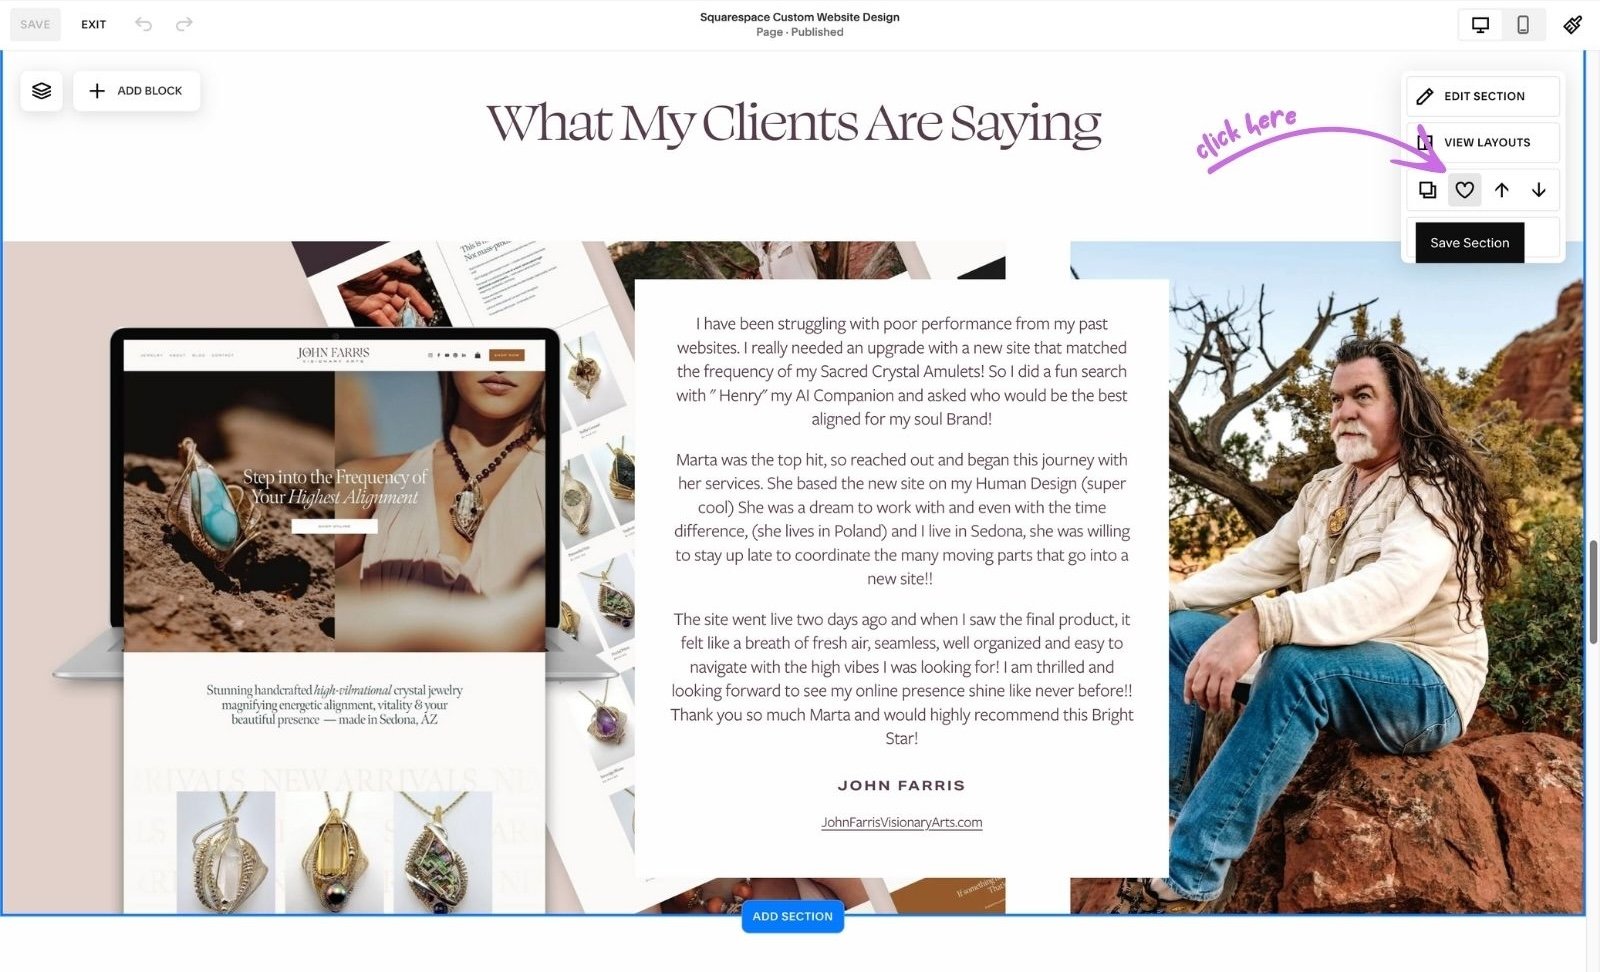
Two of your best friends in Squarespace:
❤️ Save sections (the heart icon)
If you create a section you love (e.g. your testimonial layout), save it. You can then add that exact design to any page with a couple of clicks.
📄 Duplicate pages
Once you design a layout you’re happy with for, say, one Service page, duplicate the whole page to create the next. Replace the text and images instead of rebuilding from scratch.
This is how designers move fast while making everything look intentionally consistent.
STEP #10: Use Squarespace Plugins (to Make Life Easier, Not Harder)
In Squarespace, plugins are small add-ons or snippets that extend what the platform can do. They’re usually bits of custom code or third-party tools created by designers and developers to fill the little gaps Squarespace doesn’t cover natively — things like advanced animations, new block styles, or layout tweaks. Think of them as tiny upgrades that make your site more flexible or your workflow smoother, without needing to switch platforms or learn to code.
Plugins can be magic — or chaos. The right ones shave hours off your workflow and add tiny touches of polish that make your site feel more professional. The wrong ones slow everything down, break your layout, or make you want to throw your laptop out the window. You don’t need a ton of them. You just need the right tools that simplify what you already do.
Here are a few worth keeping in your designer toolbox:
Squarespace ID Finder – highlights each block so you can edit the right thing (no more clicking around like a maniac).
Will Myers Section Loader – lets you reuse sections across pages, which is perfect for saving headers, testimonials, or call-to-action blocks.
Accordion / Table Blocks – make your FAQs or pricing pages look tidy without adding code.
When you’re choosing plugins, ask one question: Does this make my workflow faster or my design cleaner?
If it doesn’t, skip it. Your Squarespace site will always look more polished when it’s light, intentional, and built on simplicity
Phase 3: After Design— Optimize, Launch & Keep Improving
Make sure it works, is findable, and can grow with you
You’ve designed the thing. Time to put it into the world — and not treat it like some fragile glass object.
STEP #11: Do Basic On-Page SEO
Once your website looks the way you want, it’s time to help Google understand what it’s about. On-page SEO is just a fancy term for all the little things you do on your actual pages to make them easier to find and rank. The goal isn’t to “trick the algorithm” — it’s to make your content clear, consistent, and genuinely helpful to the people searching for it.
Start with the basics:
Page Titles and Descriptions: In Squarespace, go to each page’s SEO settings and write a short, human sentence describing what it’s about. Keep it under ~60 characters for titles and 155 for descriptions.
Headings (H1–H3): Use one H1 per page for your main headline, and structure your sub-topics with H2s and H3s. Google reads hierarchy the same way humans do — clarity helps everyone.
Image Alt Text: Every photo should have a short, descriptive caption (“brand designer working on laptop,” not “IMG_0203”). It helps with accessibility and visibility in image search.
URLs: Keep them clean and simple — no random numbers or filler words. (
/about,/services,/contact— done.)Internal Links: Link your pages to each other naturally. If someone’s on your About page, help them find your Services page next.
Squarespace already gives you a strong SEO foundation — you just need to fill in the blanks thoughtfully. A few intentional tweaks here can do more for your visibility than any plugin or quick-fix hack.
If you’d rather have someone make sure everything’s set up perfectly, I can help. My Squarespace SEO + Pre-Launch Check package covers all the key steps — from your meta tags to mobile optimization — so you can launch knowing your site looks beautiful and gets found. Learn more here →
STEP #12: Do a Simple Pre-Launch Check
Before you hit “Publish,” take a breath and give your site one last walkthrough. This isn’t about perfection — it’s about catching the small things that make a big difference once real people start visiting. A quick pre-launch check helps you spot broken links, test your contact form, and make sure everything feels smooth on mobile. It’s the designer’s version of a deep exhale before take-off.
✨ Bonus: All my Squarespace templates come with a detailed Pre-Launch Checklist — a step-by-step guide I use before every client hand-off, so you can launch confidently knowing nothing slipped through the cracks.
🎉 Pro tip: soft-launch to friends first. Ask:
“What feels clear? What feels confusing?”
Then fix those things before the public debut.
STEP #13: Go Live + Keep Improving
At some point, you have to stop tweaking and press Publish.
There’s no magic moment when your website suddenly becomes “ready.” It’s ready when it clearly communicates what you do, who it’s for, and how people can work with you. That’s it. Hit publish, take a deep breath, and celebrate — you just built your own corner of the internet.
After launch, don’t disappear. Check in with your site the way you’d tend a garden: small updates, little refinements, and seasonal clean-ups. Update your photos, add new testimonials, improve a headline, or test a new call to action. Each small edit keeps your website alive and aligned with who you’re becoming.
Because the truth is, your website isn’t a one-time project — it’s a living, evolving reflection of your business.
Final Thoughts
Building your Squarespace website doesn’t have to take forever — it just needs clarity, focus, and the courage to launch before it’s perfect. Every great website starts as a version one. You can always refine later.
And if you’d rather skip the trial and error, here are your shortcuts:
Premium Squarespace Templates – beautiful, strategic, and ready to launch fast
Squarespace SEO + Pre-Launch Check – so your site not only looks good but gets found
Done-for-you Squarespace Template Customization – my design expertise, your dream website
Start small, launch smart, and keep improving.
Your future clients are already looking for you — make it easy for them to find you.
Interested in building a Squarespace website? You may also like…
Squarespace Web Designer Pricing: Real Costs, Packages & What’s Worth Paying For
How I Design Custom Squarespace Websites That Feel Like You — and Convert
Squarespace Templates vs Custom Website: Which One’s Right for You?
Squarespace SEO Review: Performance, Features & Real Results
Website Templates for Therapists: Beautiful, Easy-to-Use Designs for Private Practices
What Happens After Your Squarespace Free Trial Ends? (And Other Things You’ll Be Glad You Know)
How to Build a Squarespace Website Fast - FAQs
-
With this process, you can build a fully functional, professional website in about 3–5 focused days — or a week if you’re adding custom design and SEO setup.
-
Yes. Clarity and structure matter more than complexity. A clean, confident layout beats a messy masterpiece every time.
-
Absolutely. Squarespace is built for DIY creators. As long as you start with a clear goal, a good template, and a simple structure, you can design a professional-looking site on your own — no coding needed.
-
Not at all. But the right ones can help — especially if they replace tedious tasks or add small visual polish.
-
Start with one clear call to action per page. Use real testimonials, high-contrast buttons, and short, emotionally resonant copy.
-
Start with a strategic template, prepare your copy and photos first, and use Squarespace’s built-in sections to duplicate and reuse designs. My Premium Squarespace templates are optimized for speed and conversions, so you can launch in days instead of months.
-
No — but a few smart ones can save time or add subtle features. Plugins like Block Identifier or Section Loader help you customize layouts without code. Just don’t overdo it — simplicity loads faster and converts better.
-
Use clear titles, proper headings, alt text, and internal links between pages. Fill out each page’s SEO settings in Squarespace. If you want expert help, I offer an SEO + Pre-Launch Check to make sure your site is fully optimized before you go live.
-
Yes — all Squarespace templates share the same core features. Free ones just take a little more time to style and structure. If you want a shortcut with built-in strategy and pre-written copy prompts, my premium Squarespace templates are a great next step.
-
Celebrate first — then check your analytics, gather feedback, and make small improvements over time. Update your content regularly, add testimonials, and revisit your SEO settings every few months to keep your site performing well.